2.6 Fuellox ConfigurationLink
Once the Fuellox unit is installed, the hardware needs ot be configured. The Fuello App configures the unit.
2.6.1 Configuration OptionsLink
| Feature | Description | Default Value | unit |
|---|---|---|---|
| Timers | |||
| Pre Flow Timeout | Time to start flow once pump starts | 20 | sec |
| Post Flow Timeout | Time to restart flow once pump stops | 40 | sec |
| Residuals Timer | Time to detect flow once transaction stops | 3000 | milli sec |
| BT Reconnect Timer | Time to reconnect BT if connection is broken | 3000 | milli sec |
| Max Pump Run Timer | MAx time for pump active. Creates a pump On/Off duty cycle | 0 [Disabled] 10 = 10 on, 10, off |
Min |
| IO Options | |||
| Nozzle Switch | True/False for Nozzle Switch installed | False | Boolean |
| E-Stop (Open) | Normally Open EStop installed | False | Boolean |
| E-Stop (Close) | Normally Closed EStop installed | False | Boolean |
| Override | Not Applicable - Future capability | False | Boolean |
| Level Options | |||
| Level Installed | Level instrument installed | False | Boolean |
| Max Level | Max hight of liquip in mm. usually same as Safe Fill | 3000 | mm max |
| Max Analogue | Max analogue value | 20 | mA max |
| K-Factor | |||
| Pulse Meter K-Factor | Pulses per litre for the Pulse Meter Model Check your meter instructions. |
33 for K-24 106.841 for OM-025 |
pulse per litre |
| Untis should be Calibrated by a suitably qualifed service agent. | |||
| Other | |||
| Illegal Vol | Volume to detect & log from non authorised pulses. acts as a noise filter if needed |
2000 | mL |
| Bypass | Not Applicable - Future capability | False | Boolean |
| Demo Mode | Virtual pulse input. Simulates a pump running. Used for testing and demos |
0 = Off 100 = on |
pulse per second |
Discuss your settings with the help desk if needed.Link
Most units arrive to the end user with the default configuration appiled.
To update the Config you must be in Bluetooth range of the unit.
Info
You must be in range of the Fuellox device to apply its Configuration.
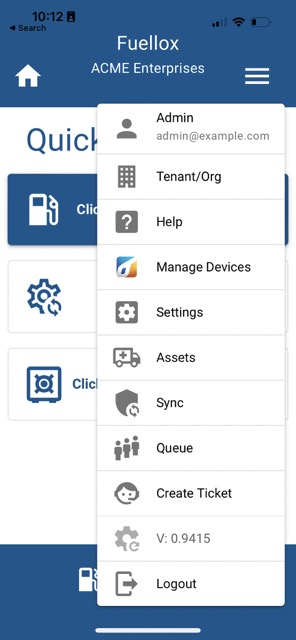
2.6.1 Accesing the Config OptionsLink
Not every user has access to Manage a Fuellox Device. The help desk can provide access to these features when needed. It really designed for installers, resellers and service agents. From time to time a customer may need to edit config. ie to change a timer, or add an estop etc.
If you don't have the Manage Devices option in your Fuellox Menu call the Help Desk or your reseller.
2.6.2 Manage Device Config PageLink
Toggle the Bluetooth switch to find your device.
Device Search and ConnectLink
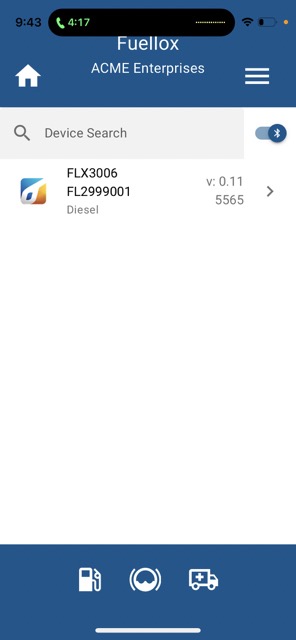
Tap your device to Connect and open the Config page. The App will need connect to the actuall device.
Should the connection not be completed, just hit Retry
Connect RetryLink
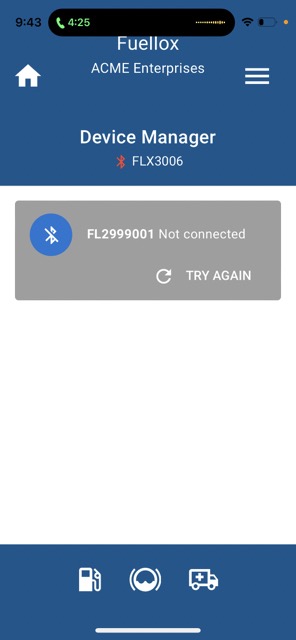
Warning
If you see a message to PAIR be sure to accept the request.
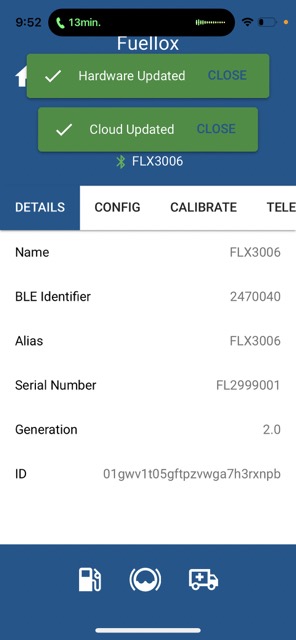
Once connected the Units Details will be shown
ConnectedLink
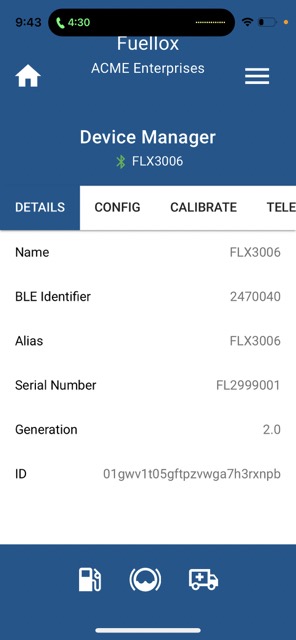
2.6.3 Apply the Devices SettingsLink
Click the Config TabLink

Enter the Timeout values, or accept the default values.
Scroll down
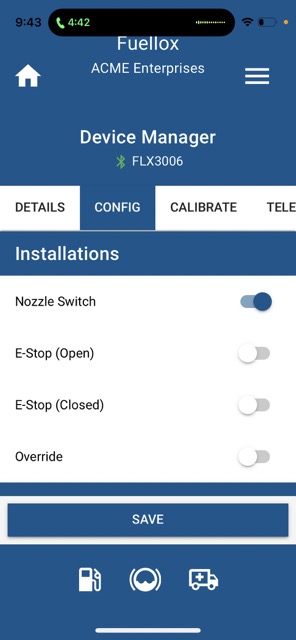
2.6.4 Apply the Installation (IO) togglesLink
Set the nozzle and estops according to the systems installed and wired up.
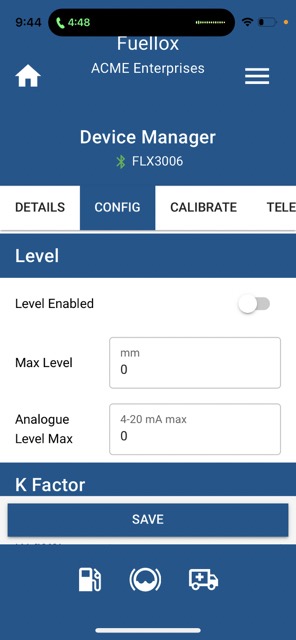
2.6.5 Apply Level AttributesLink
Set the Level switch on. Be sure to use an approved level instrument. ie IOTIQ FLX-LVL-JPS3
If you are unsure of the other settings advise the Help Desk and they can make some suggestions to get the system operational.
Note
For the Level System to work be sure to choose or upgrade to the 'FLEET' service.
2.6.7 Enter the K-FactorLink
Enter the kFactor if its not already applied.
If you enter the default value from your pulse meters instructions you will also need to complete a proper calibration.
Some meters are shipped with a calibration certificate [ie Flomec OM-025 variants and Macnaught MX series] and these high end meters are often a much lower cost than the calibration service required for a low cost meter.
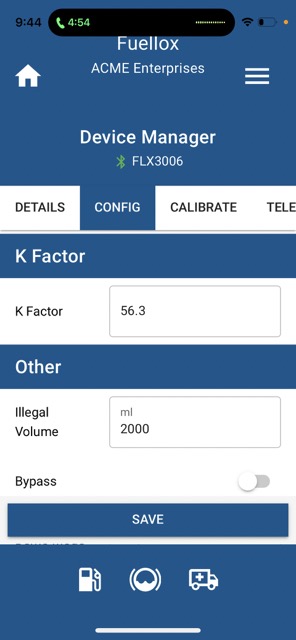
2.6.7 Enter the Optional (Other) SettingsLink
In most cases these settings won;t change and the default values suit 99% of use cases.
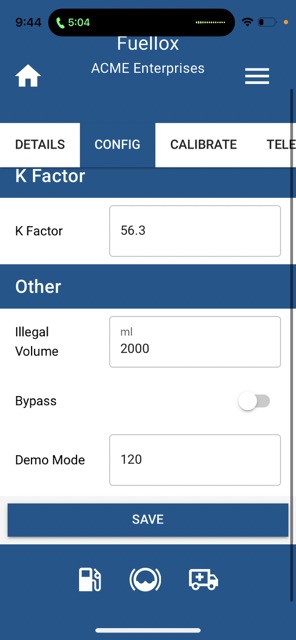
2.6.8 Demo ModeLink
Demo Mode is useful if a system is to be Configured before the wiring is complete. Enter a value into the Demo Mode field, and this will simulate a virtual pulse meter. When the pump starts (and nollze lifted) the pulses shall commence, and a cirtual fuel dispense shall occcur. This data is posted to the Fuellox Cloud.
Demo transactions can be removed later, jsut advise the help desk and they can schedule the deletion.
2.6.9 Save ChangesLink
Click Save and the updated shall be applied to the Device and Cloud.
2.6.10 Reboot the DeviceLink
Once changes are applied, the device must be switched off and rebooted. A power cycle is required at the completion of this process. Failure to reset the device may prevent the device operating with the new Configuration.
Warning
The Device must be Power Cycled after the change are appllied .
2.6.11 CalibrationLink
See Here for information on how to start the calibration process.